Beginner’s Guide To Using Instagram Ads Manager

In recent years, Instagram has grown to become one of the world’s largest social media platforms, far surpassing Twitter in terms of audience size, despite being 4 years younger. With over 1 billion active users, and plans for expansion over the next few years, it’s not going anywhere soon.
It’s fast becoming the place to be for businesses as they look to grow their advertising and take advantage of Instagram influencers and their power to reach target audiences.
If you’re looking to get started and create ads on Instagram, we’ll take you through our Beginner’s Guide to Instagram Ads Manager to enable you to easily publish successful Instagram ads that will help you sell more and reach new audiences.
Getting Started
As Instagram is owned by Facebook, you’ll need to log into Facebook Ads Manager to create, monitor, and manage your social ads.
If you already have an Instagram account that you want to start advertising with, then you’ll need to make sure it is either added to your Business Manager or connected to your Facebook page.
If you don’t have an Instagram account, you can still advertise on Instagram using your Facebook page instead.
How To Use Instagram Ads Manager in 9 Easy Steps
Step 1 - Start creating your ads
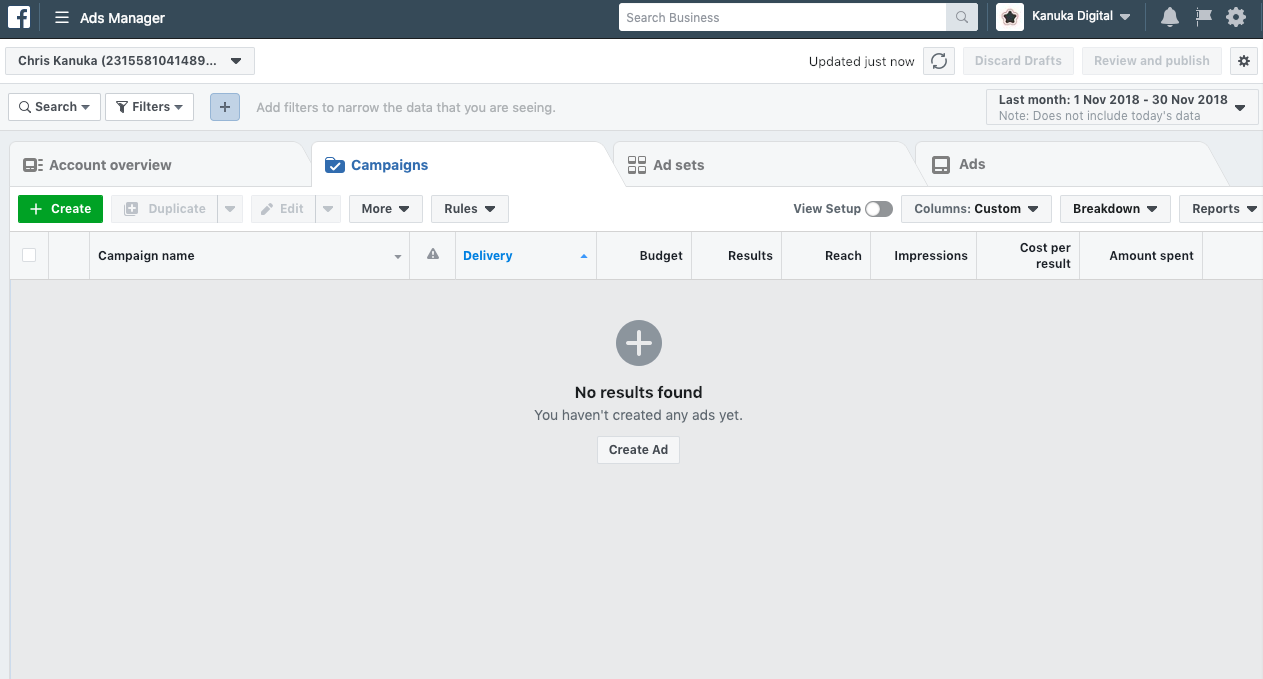
Log in to Facebook and head to the Ads Manager section, where all of your existing ad campaigns will be visible. If you don’t have any running, then this section will be blank, so click ‘Create’ to get started.
We’re taking you through the in-depth ‘Guided Creation’ process, which is the default approach and probably the most popular way, particularly for users who are creating ads for the first time.
This will automatically take you through the guided tour and allow you to select the best advert type, objectives, and budgets to meet your business needs.
However, if you’re in a hurry then select ‘Switch to Quick Creation’ to set up your adverts quicker.
Step 2 - Choose your objective
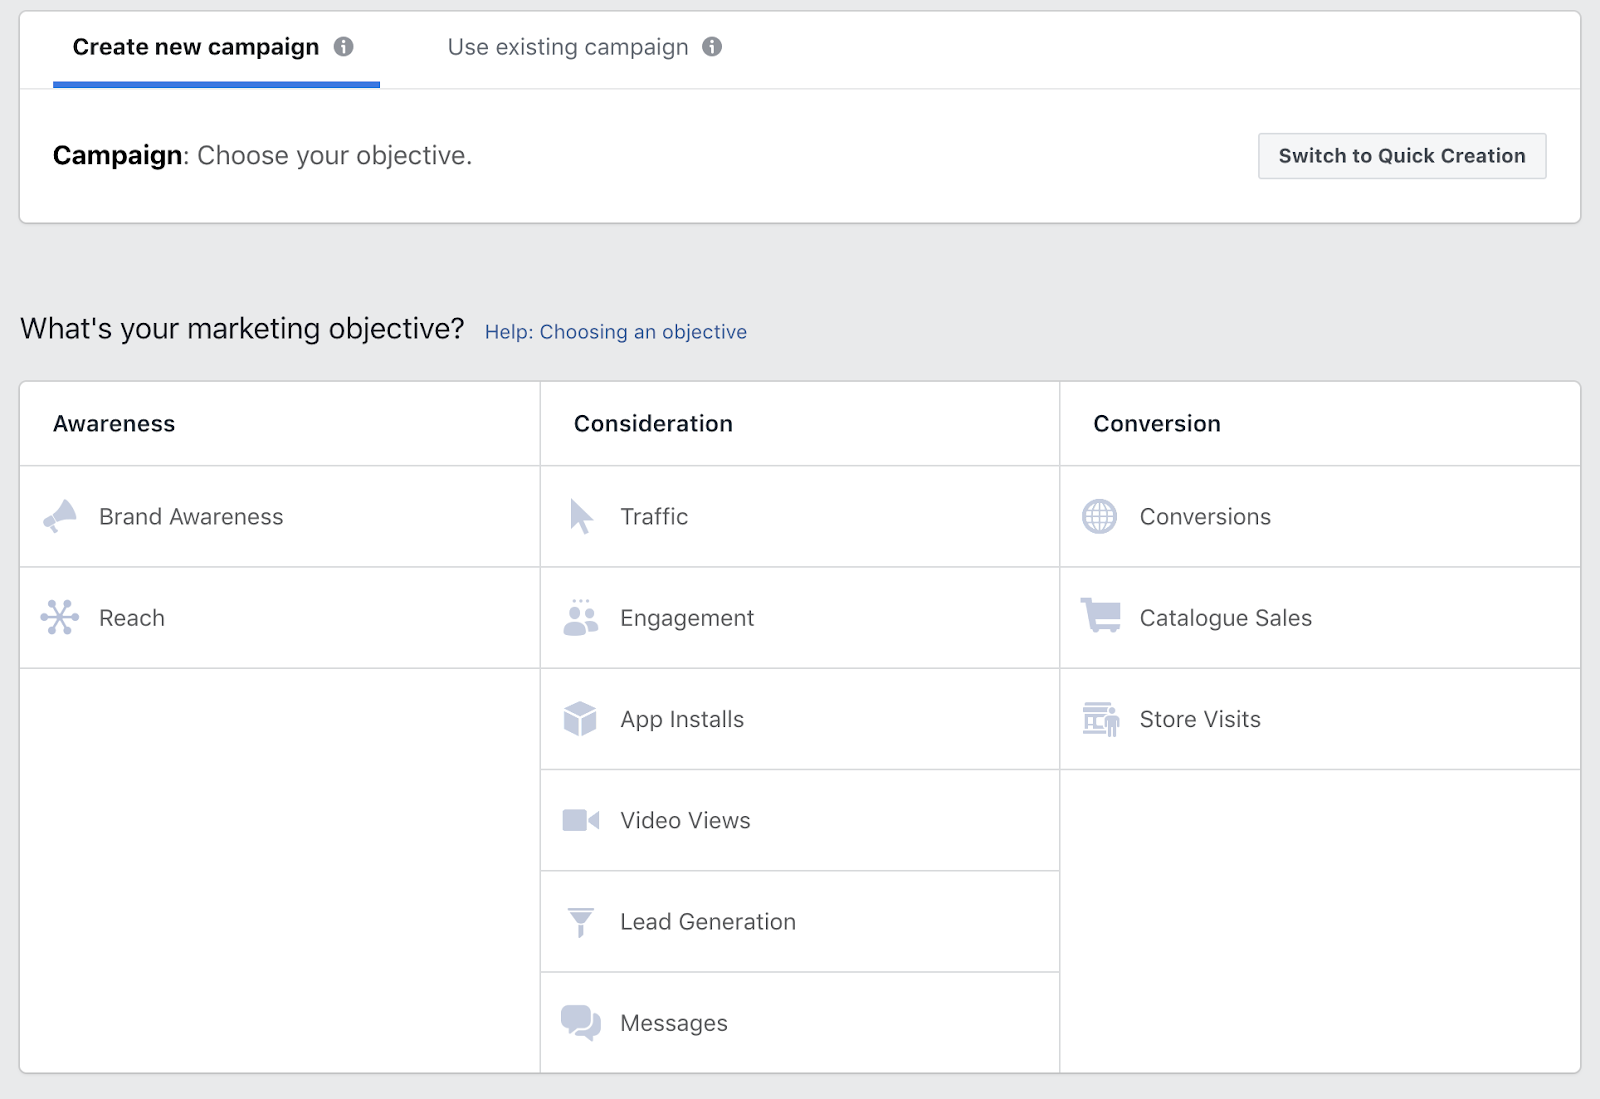
Objectives are categorised into three choices: awareness, consideration, and conversion. Each category has a range of campaign types, with different focuses to suit all kinds of goals.
For a new business, you’re most likely to run an awareness campaign, focusing on “Brand Awareness”. For a business trying to improve the number of people buying their products, you might choose a more sales driven campaign such as “Conversions”.
For each objective, Facebook includes an informational box as you hover over each button. This is great for telling you exactly what kind of objective this campaign should have and helping you select the most relevant objective to your business.

Not all objectives are eligible to be shown on Instagram Ads, so make sure you choose one of the following: Brand Awareness, Reach, Traffic, App Installs, Engagement, Video Views, or Conversions.
Step 3 - Name your campaign

Once you’ve selected your objective, you then need to name your campaign. You can also choose whether you’re going to run an A/B test or whether you want Facebook to automatically optimise your budget across ad sets.
An A/B test is particularly useful if you want to test how well your creatives work. For example, by running the same campaign to the same audience only with two different images for the ad, you can see what stands out best and works for your audience.
Allowing Facebook to automatically optimise your budget makes sure that the spend is spread evenly across your adverts, which will in turn help you get more results if certain ads are performing better than others.
Note: If you haven’t set up an Ad Account by this point, you’ll be asked to do so here. This includes adding your account country, the currency in which you’ll pay for your adverts, your time zone, and your ad account name.
Step 4 - Set your audience
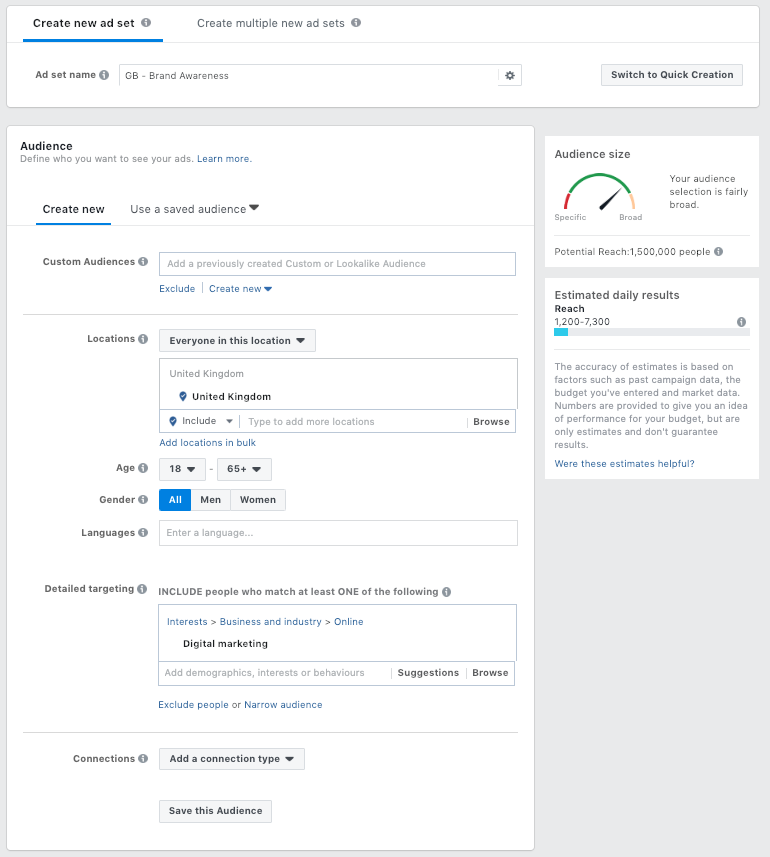
Then, you’re on to step three: creating an “Ad Set”. This is where you create an audience, budget, and schedule a bidding strategy for your campaign.
This is where you define the types of people you want to have see your ads. You can do this by selecting factors such as location, age, gender, and language, and then look at excluding certain behaviours, interests, or demographics.
In turn, Facebook will generate an ideal “audience size” to show you how broad your audience is, your potential reach, estimated daily results, and more. This is great for getting insight into what to expect from your campaign meaning you can change your ad strategy accordingly.
Tip: How niche your audience is and your allocated budget will define the potential reach for your campaign.
Step 5 - Choose your placements, budgets, and schedule
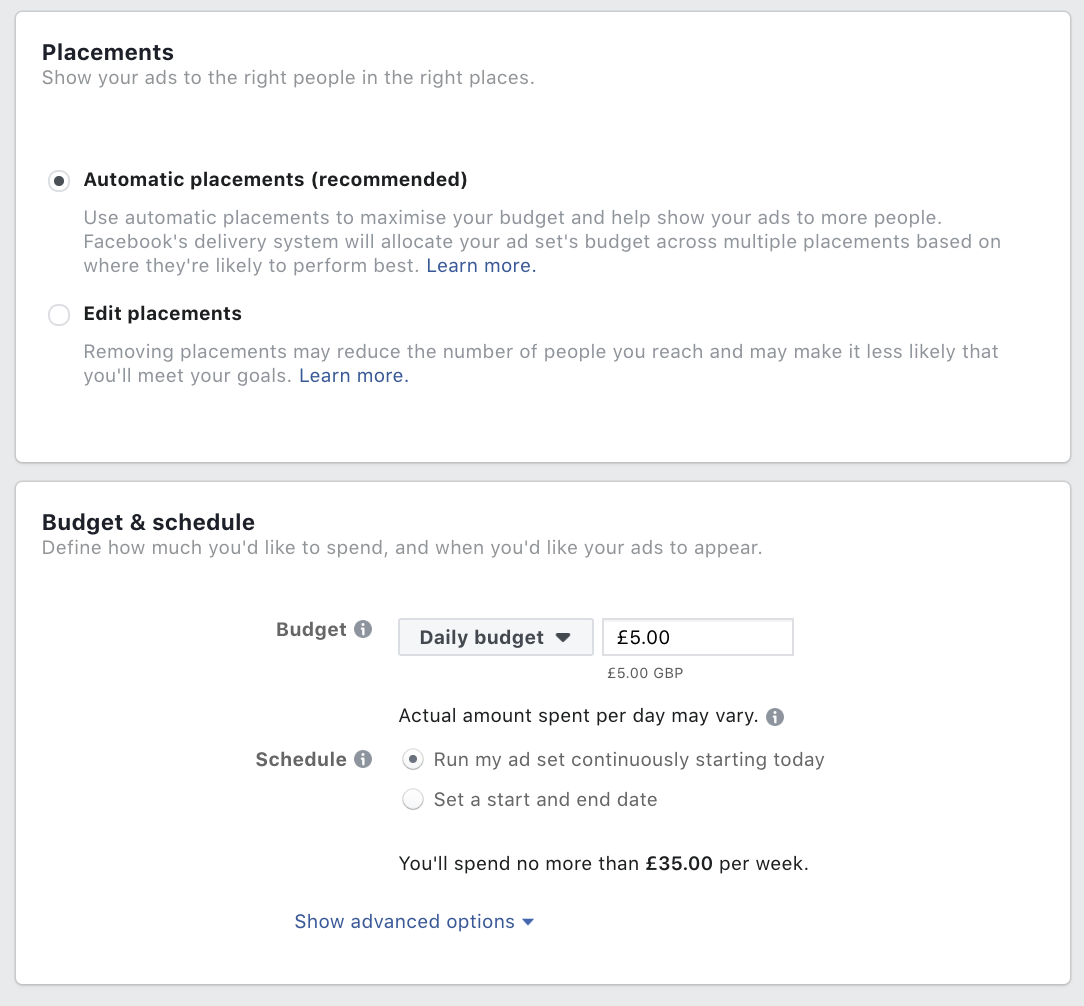
The next step in this section is to set where you would like your adverts to show, so you can ensure your advert pops up in the right place. You’ll also need to define your daily budget and ad schedule (when you’d like your ads to appear).
By selecting ‘Edit placements’ you can choose exactly where on Facebook, Instagram, Messenger, or the Audience Network you want your adverts to appear. If you only want to advertise on Instagram, then you can deselect all of the options apart from ‘Instagram Feed’ and ‘Instagram Stories’.
You can either set your budget to run to a maximum spend each day, or set a time limit for your campaign and choose an overall budget.
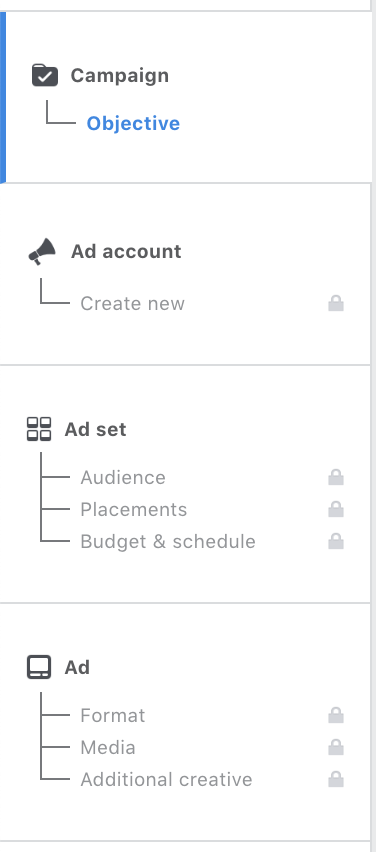
Good To Know: You can track your settings using the left-side checklist. By selecting the different steps you can switch between the tabs, making it super easy to correct your mistakes if required.
Step 6 - Name your ad set

It might seem like a minor thing but the way you name your ad sets is extremely important. Using a random name will make it harder for you to manage your adverts and see which ones are performing well.
Try to include information like placement, targeting, age range, and creative type within your ad name; this will help make monitoring and managing your ads quick and easy. Here is a good example:
mob_uk_2550_ad1
This could represent a mobile-focused ad, targeting users in the UK aged between 25 and 50.
Step 7 - Choose the type of advert you want to show
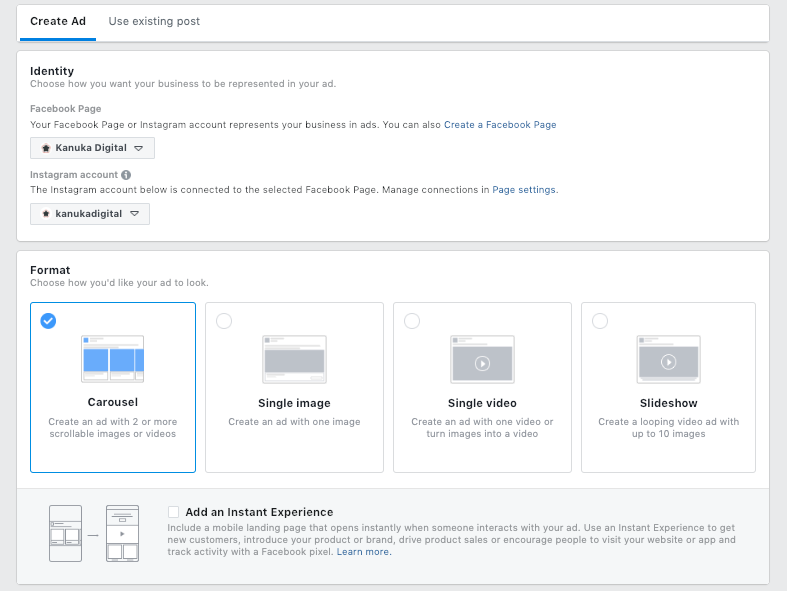
Now onto the fun part: actually creating your advert. Firstly, make sure you select the correct Facebook page and Instagram account that you’d like your adverts to appear from.
Next, select your ad format by choosing from either a carousel, single image, single video, or slideshow, depending on the creative that you want to share.
If you’ve already got a post on your Facebook page or Instagram account that you want to use as your advert, then select ‘Use existing post’ and select from the list.
Step 8 - Create your copy and set your URL and call to action
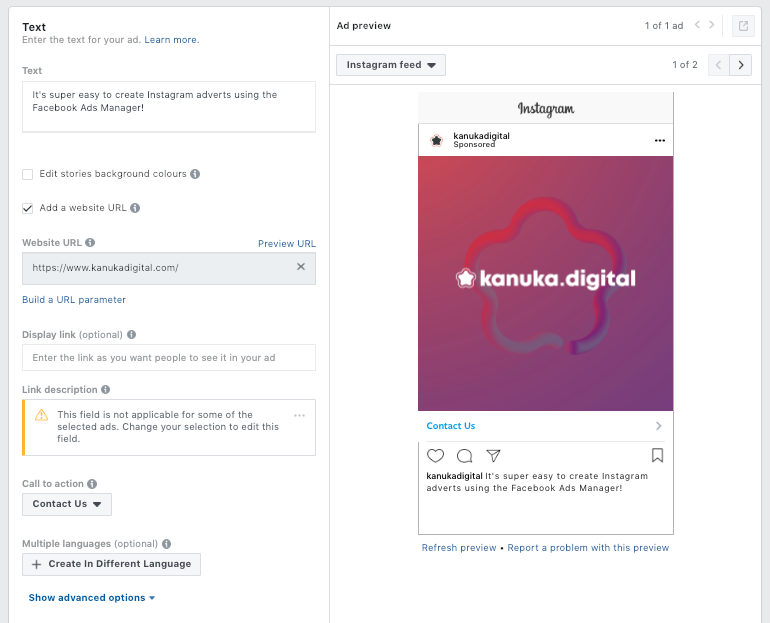
If you’re creating a post from scratch, fill in all the fields with engaging copy, eye-catching imagery, and a link to your website, if required.
You should also add a call to action within your advert to encourage people to contact your business, visit your website, or even download a brochure.
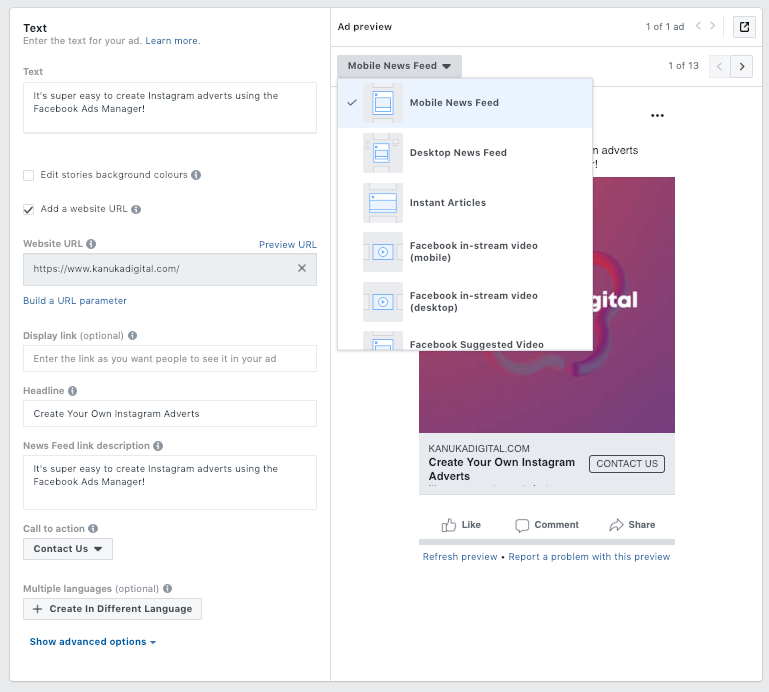
Once you’ve added this information, you’ll be able to preview how your ad will look before it’s live. This is where tweaks to your design and text can be made. By sorting through the “preview” filters, you can see how it’ll look on mobile, desktop, in-feed, in your Instagram stories, and more.
Step 9 - Review and set live!
Once you’re happy with how your Instagram ads look, you can then “review” your entire ad creation, or alternatively, “Confirm” you’re happy with the edits.
Tip: We advise that you review your ad creation before confirming it should be scheduled. This will give you another chance to ensure everything has been entered correctly and you’ve given your ads the best chance of generating your desired outcomes.
Once you’ve hit ‘Confirm’ and your adverts go live, they should start appearing a few hours after they’ve been through the review process. After this, Facebook and Instagram will monitor which types of audiences are interacting more with your adverts and automatically adjust some targeting for you to ensure that you’re reaching the best users possible.
Once this process has been completed, your ads will be fully live and you should start to see results straight away!
Summary
Now you should understand how to create Instagram Ads using Facebook Ads Manager.
Facebook includes helpful tips to guide you through the ad placement process to make your life a little easier.
It’s important to monitor your ads’ costs and make sure you’re not overspending your budget. You can always make adjustments as needed based on the best target audiences, and you can check regularly for any comments and interactions on your Instagram ads.
Of course, if you’d like any further help from our team of experts, don’t hesitate to contact us - we’d love to hear from you!

Ready to automate your reporting?
Read More

Don’t miss out!
Follow us on social media to stay tuned!
Automate your reports!
Bring all your marketing data into one automated report.
Try dashthis for free